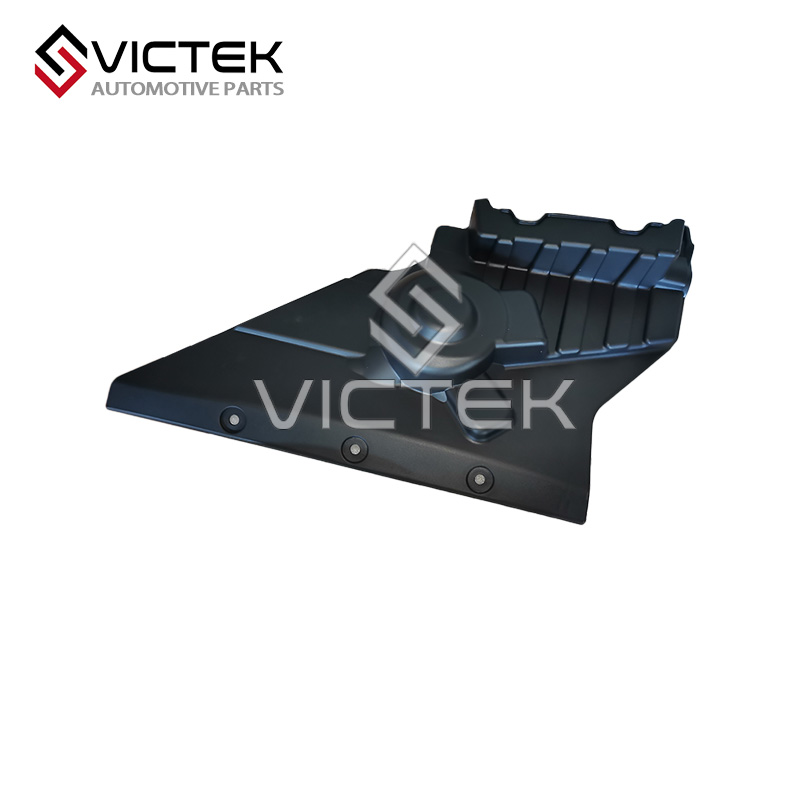
401001002AA
Chery Tiggo7 Pro Right Front Bumper Bracket (Part No.: 401001002AA)
First of all, let's clarify its core function: The right front bumper bracket 401001002AA of the Chery Ggo 7 Pro is not merely a "support piece" - it is a key structural link connecting the right front bumper and the front body frame of the vehicle. It can be imagined as a durable and precisely machated component, installed on the right front frame track of the Tiggo7 Pro, right behind the right side of the front bumper. What is its main job? Firmly secure the right front bumper to the vehicle body (to prevent it from swaying or coming off during driving), absorb minor forward impacts (for example, hitting the curb) to protect the bumper and frame from damage, and keep the bumper perfectly aligned with the front panel of the vehicle body (which is crucial for aesthetics, airflow and clearance consistency). Without it, the right front bumper would sag, creak and even loosen - spoiling the car's appearance and posing a risk of further damage.
The right front bumper bracket is specially designed for Chery Tiggo7 pro. Please make sure to confirm the vehicle's VIN! Its shape matches the front frame and bumper mounting points of the Tiggo7 Pro (no forced adjustment required), its thickness is calibrated to support the weight of the front bumper (it will not bend under load), and its connection holes are synchronized with the clips/screws of the bumper (for seamless assembly). General parentheses? The problems you will face are: it is too weak (causing the bumper to sag), misaligned (resulting in an uneven gap between the bumper and the body), or incompatible (requiring drilling to damage the frame) - all of which will cost a lot of money for repairs.
1. Core Jobs: Secure, Protect & Align

This 401001002AA bracket is only for the right front bumper of the Chery Tiggo7 Pro—wrong fit = bumper failure:
Installation and Maintenance (Recommended Advantage - Calibration is key!)
Installation: Registered Chery technicians are preferred
Poor installation disrupted the bumper's positioning - here's what professionals do:
Entering the front frame: Technicians remove (or loosen) the right front bumper section to touch the old bracket, and then remove the old component from the frame with bolts.
Install the new bracket: They align the 401001002AA with the frame bolts, tighten them (using the torque specified by the factory to avoid over-tightening), and connect the bumper to the positioning card of the bracket.
Check the positioning: They adjusted the bumper to ensure a uniform gap with the front fender and headlamps, and then tested the shake (gently pull the bumper to confirm if it is fastened).
Maintenance: Keep it safe and intact
Check the bolts every six months: Tighten the loose installation bolts (road vibration can cause them to loosen, preventing the brackets from shifting and the bumpers from sagging).
Pre-collision post-collision inspection: Even minor collisions (for example, hitting the stop block) can cause the bracket to bend - if the bumper clearance appears uneven, check if the bracket is damaged.
Annual cleaning: Wipe the bracket (visible part) with a damp cloth to remove dirt/road salt (to prevent steel brackets from rusting or plastic from degrading).

Summary: Chery Tiggo7 Pro Right Front Bumper Bracket (401001002AA)

Contact us